As you can probably find is the case for your own life, some of my earliest memories revolve around food – but for me, it wasn’t just the smells and tastes of certain foods I ate as a child growing up in the South…things like homegrown tomatoes, and fried okra, chicken, and catfish.
Lots and lots of fried stuff…
But I also remember watching my mother and Grandmother cook special things too.
My mom’s ability to make homemade bread and rolls was (and still is) a mystery! And what a joy it was to see how they could turn the basic building blocks of flour, sugar, eggs, and milk – as if by magic – into all kinds of things – from cakes, to cupcakes, and even pies! Watching it was like watching an actual miracle unfold before my eyes!
One of the things I remember my grandmother used to make regularly was a Banana pudding.
My grandmother was born before the turn of the century, and it was fascinating just to see the gadgets she used to cook with. I remember watching her mix things with a hand cranked mixer. (My mom had an electric mixer, but my grandmother never owned one.) She stirred and mixed most things by hand, but if she needed a little more speed, she would occasionally pull out a small metal hand mixer with a crank handle that had a little round wooden knob on it.) All the kitchen gadgets she used were simple and basic, but all worked seamlessly, and she worked so quickly, that the lack of power tools seemed not to slow her down one iota. Her best tools though, were the same ones that are still the tool of choice of every cook and chef in the world today – her own two hands.
Though my grandmother passed away before I realized it, I would have loved to have had her Banana Pudding Recipe, but I feel sure that even the one that’s on the back of a Nilla Wafer box is in all respects a very close approximation to hers (making pudding isn’t rocket science…), and is in fact the recipe that I began using when I first began trying to make Banana Pudding for my own family.
My adult children still love Banana pudding, and I recently was asked to make my recipe once again. I did and was happy with the results, but it occurred to me, it might be time to share my recipe (and my secret that the recipe really isn’t a secret at all…lol), so that the Banana pudding tradition in our family can live on for them to use in their families too.
One final note: our family has developed at bit of lactose intolerance, so I have modified the recipe to use Lactaid rather than regular milk and find that it works just fine. So, feel free to use either regular milk or whatever unflavored milk substitute is of your own choosing, when making this Banana pudding for your family. It should work just fine.
Mom’s Homemade Banana Pudding
Ingredients:
1 ¼ cup white sugar (Note: Use 1 cup to make the pudding and reserve ¼ to use in making the meringue topping)
Pinch of salt
3 large eggs – separated with yokes together and whites together (You will use the egg whites to make the meringue topping later)
3 cups regular milk or Lactaid brank milk (or whatever unflavored liquid milk substitute you prefer)
1 tsp Vanilla extract
1 box Nabisco Nilla Wafers
5-6 bananas
¼ cup real butter
Instructions:
- Preheat oven to 350 degrees.
- Combine sugar, flour, and salt in a heavy saucepan.
- Mix egg yokes and milk together, then pour in just enough to moisten the dry ingredients in the saucepan. Little by little, continue pouring the milk/egg mixture into the saucepan while continuing to stir/whisk as you go along. (Note: You do this so that you incorporate all your liquid into your dry ingredients without creating lumps in your pudding. If you do it too quickly, you will probably create lumps. If you do so, don’t sweat it, because most if not all of them will dissolve as you cook the pudding, but if you’ll just take your time with this step, it will ensure you don’t form lumps from the git go, and so it’ll just help save you having to stress over it. ‘Just speaking from experience...)
- Cook over medium to medium high heat, stirring constantly, until ingredients are thickened and smooth.
- Remove from heat and stir in 1 tsp of vanilla and ¼ cup of butter.
- Let cool (for at least 15 minutes).
- Line the bottom (and around the sides) of your pan with wafers and then cover the wafers on the bottom of pan with sliced bananas.
- Pour about 1/3 of your pudding over the first layer of wafers and bananas.
- Add another layer of wafers and bananas and pour 1/3 more pudding on top.
- Finish by adding one last layer of wafers and bananas and top with the remaining 1/3 of pudding.
Meringue topping:
Ingredients:
3 egg whites
1/8 teaspoon Cream of Tartar (if you don’t have it, it’s okay, the recipe will still work just fine)
¼ cup white sugar
½ tsp Vanilla extract
Instructions:
- In a mixing bowl, whip egg whites (using medium high to high speed) until foamy and beginning to grow in volume.
- Add cream of tartar, sugar, and vanilla.
- Whip all the ingredients very well, and until stiff peaks can be seen when you lift the mixer blades out of the mixture.
- Spread meringue over the banana pudding and bake in the oven until the meringue is browned to your desired level of color (keep an eye on this, as it won’t take too long and will burn quickly once it begins to brown).
- Remove from heat and serve immediately (or cool in the refrigerator and serve chilled if you prefer).

Pudding ingredients (Not pictured: vanilla extract and butter – to be added at the end of cooking). 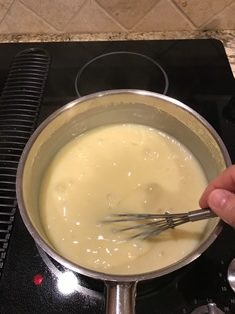
The pudding thickens slowly, but stir, stir, stir, so it doesn’t scorch! 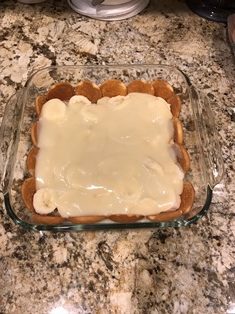
First layer with wafers on the bottom and sides, bananas, and 1/3 of the pudding. 
Pour remaining pudding over the last layer of wafers and sliced bananas 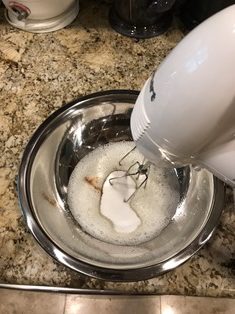
When the egg whites start to get foamy and grow in volume, then add the remaining ingredients and start whipping up a storm! 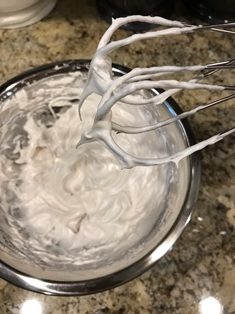
The meringue is ready when you can form stiff peaks when you pull the mixer blades out. 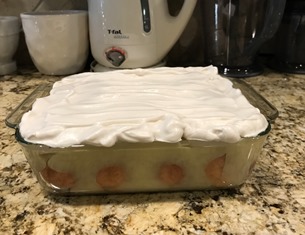
Cover the whole pudding with the meringue topping. 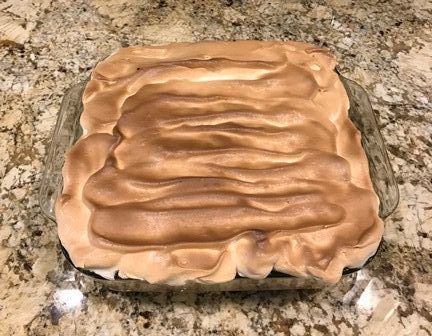
Bake in the oven until your meringue reaches your desired color, and it’s finished. Serve warm or cold. Yum!!